Introduction to Shell
Approximate time: 30 min
Learning Objectives
- Log in to a high-performance computing cluster
- Navigate around the Unix file system
- Differentiate between full and relative paths
- List files in a directory
- Copy, remove and move files
Setting up
We will spend most of our time learning about the basics of the shell command-line interface (CLI) by exploring experimental data on the lab417 SAIAB cluster. So, we will need to log in to this remote compute cluster first before we can start with the basics.
Let’s take a quick look at the basic architecture of a cluster environment and some cluster-specific jargon prior to logging in.

Each computer in a cluster is called a ”node”. Nodes have designated roles: login nodes for connecting, and compute nodes for analysis. Storage is shared across all nodes. On the lab417 SAIAB cluster, we don’t have a dedicated login node.
Logging in to lab417 server
lab417 accounts
For this workshop we will be using training accounts to log in. We will be providing each of you with your own training account associated with a password for the duration of this workshop.
Tool(s) to access remote computers/clusters
With Mac OS
Macs have a utility application called “Terminal” for performing tasks on the command line (shell), both locally and on remote machines. We will be using it to log into lab417.
Please find and open the Terminal utility on your computers using the Spotlight Search at the top right hand corner of your screen.
With Windows OS
By default, there is no built-in Terminal that uses the bash shell on the Windows OS. So, we will be using a downloaded program called “MobaXterm". MobaXterm is a comprehensive remote computing tool designed for Windows. It integrates an X11 server, a tabbed SSH client, and various network tools, providing a versatile environment for system administrators, developers, and IT professionals. It also provides you the functionality of the Terminal utility found on the Mac and Linux Operating systems.
Please find and install MobaXterm on your PC.
Detailed instructions can be found in the file Remote_login_using_MobaXterm.Let’s log in!
Everyone should have installed MobaXterm and successfully logged on to the lab417.saiab.ac.za server with their accounts. Alternatively use the IP number: 172.20.142.126.
- If this is the first time you are connecting to the cluster, a warning will pop up and will ask you if you are sure you want to do this; type
YesorY.
Tip - Syntax for all commands on the command-line interface is the command followed by space and then optionally a few arguments.
Once logged in, you should see the lab417 icon, some news, and a new command prompt:
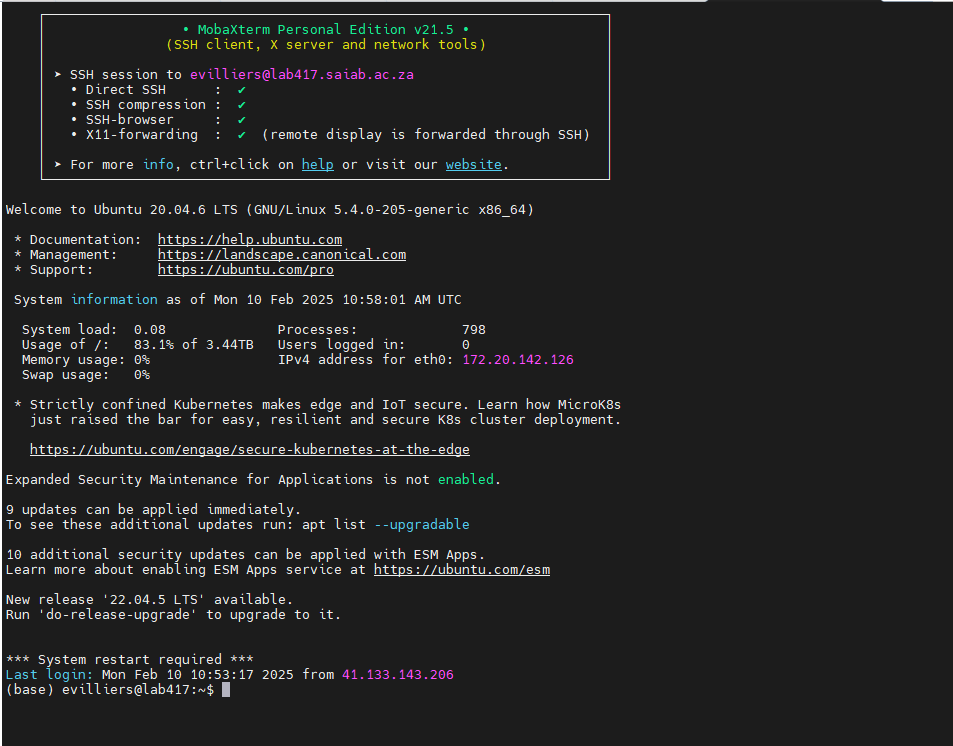
username@lab417: ~$
The command prompt on lab417 will have some characters before the $, something like username@lab417: ~, this is telling you your username and the name of the login node or server name you have connected to!
Please note that from this point on in the workshop
anything we want you to type next to the command prompt will be preceded
by the $ (see below). Please make sure you do not type out (or copy and paste) the $ at the beginning of a command into the Terminal.
Let’s move from the login node to a compute node!
The first command we will run at the command prompt will be to start a so-called “interactive session” on lab417. This command will connect us to a compute node, so that all of the commands we run will be processed by a computer designated to do analysis (and not designated to log in users). Copy and paste the command below.
$ srun --cpus-per-task=1 -t 0-6:30 --mem 500M --pty /bin/bash
Press enter, and in a few seconds you should get back the command prompt $. Now the string of characters before the command prompt will be different. They should say something like:
[SLURM] (base) username@lab417:~$
Make sure your command prompt now contains the word “SLURM”. Once it does, we are ready to copy over some data to work with!

Copying example data folder
Now that we are all set up to use lab417, the first thing to do is to check if there are any files in the data folder we are currently in. When you log in to a cluster, you will land within a folder designated specifically for your use, and is referred to as your “home directory”.
Let’s list the contents of our home directory using a command called ls.
$ ls
It should show you that you have 0 files, or not show you anything at all because you don’t have any data there as yet!
Let’s bring in a data folder from a different location on the cluster to our designated area by using the cp command. Copy and paste the following command all the way from cp and including the period symbol at the end .:
$ cp -r /opt/courses/unix_lesson/ .
(If you are not on the lab417 server, download the data folder from here: unix_lesson.tar.gz. Extract the download the file in your working directory:)
$ tar zxvf unix_lesson.tar.gz
cp -rcopies a directory recursively. The source is/opt/courses/unix_lesson/, the destination.means your current directory.
Now let’s see if we can see this data folder we brought in and if it can be “listed”.
ls
You should see the string of characters “unix_lesson” show up as the output of ls. This is a folder we should all have duplicates of.
Tip -
lsstands for “list” and it lists the contents of a directory.
Starting with the shell
To navigate into the unix_lesson directory, use the cd (change directory) command:
$ cd unix_lesson
Did you notice a change in your command prompt? The “~” symbol from before should have been replaced by the string unix_lesson. This means that our cd command ran successfully and we are now in the new directory. Let’s see what is in here by listing the contents:
$ ls
You should see:
genomics_data other raw_fastq README.txt reference_data
Arguments
There are five items listed when you run ls, but what types of files are they, or are they directories or files?
We can modify the default behavior of ls with one or more “arguments” to get more information.
$ ls -F

genomics_data/  other/  raw_fastq/  README.txt  reference_data/
Anything with a “/” after its name is a directory. Things with an asterisk “*” after them are programs. If there are no “decorations” after the name, it’s a normal text file.
You can also use the argument -l to show the directory contents in a long-listing format that provides a lot more information:
$ ls -l
total 20
  drwxr-xr-x 2 evilliers evilliers 4096 Mar 13 09:59 genomics_data
  drwxr-xr-x 2 evilliers evilliers 4096 Mar 13 09:59 other
  drwxr-xr-x 2 evilliers evilliers 4096 Mar 13 09:59 raw_fastq
  -rw-r--r-- 1 evilliers evilliers  377 Mar 13 09:59 README.txt
  drwxr-xr-x 2 evilliers evilliers 4096 Mar 13 09:59 reference_data
Each line of output represents a file or a directory. The directory lines start with d. If you want to combine the 2 arguments -l and -F, you can do so by saying the following:
ls -lF
Do you see the modification in the output?
Explanation
Notice that the listed directories now have / at the end of their names.
Tip - All commands are essentially programs that are able to perform specific, commonly-used tasks.
Access the manual for any command with man. Navigate with spacebar (forward), b (back), and q to quit:
$ man ls
The Unix directory file structure (a.k.a. where am I?)
Let’s practice moving around a bit. Let’s go into the raw_fastq directory and see what is in there.
$ cd raw_fastq/

$ ls -l
Great, we have now traversed some sub-directories, but where are we
in the context of our pre-designated “home” directory that contains the unix_lesson directory?!
The “root” directory!
Like on any computer you have used before, the file structure within a Unix/Linux system is hierarchical, like an upside down tree with the “/” directory, called “root” as the starting point of this tree-like structure:

Tip - Yes, the root folder’s actual name is just
/(a forward slash).
That / or root is the ‘top’ level.
When you log in to a remote computer you land on one of the branches
of that tree, i.e. your pre-designated “home” directory that usually has
your login name as its name (e.g. /home/rsk27).
Paths
Now let’s learn more about the “addresses” of directories, called “path” and move around the file system.
Let’s check to see what directory we are in. The command prompt tells
us which directory we are in, but it doesn’t give information about
where the raw_fastq directory is with respect to our “home” directory or the / directory.
The command to check our current location is pwd, this command does not take any arguments and it returns the path or address of your present working directory (the folder you are in currently).
$ pwd
In the output here, each folder is separated from its “parent” or “child” folder by a “/”, and the output starts with the root / directory. So, you are now able to determine the location of raw_fastq directory relative to the root directory!
But which is your pre-designated home folder? No matter where you have navigated to in the file system, just typing in cd will bring you to your home directory.
$ cd
What is your present working directory now?
$ pwd
This displays the full path to your home directory. The ~ in the prompt represents your home directory and can be used as shorthand for the full path (e.g. ~/unix_lesson instead of /home/username/unix_lesson).
Using paths with commands
You can do a lot more with the idea of stringing together parent/child directories. Let’s say we want to look at the contents of the raw_fastq
folder, but do it from our current directory (the home directory. We
can use the list command and follow it up with the path to the folder we
want to list!
$ cd

$ ls -l ~/unix_lesson/raw_fastq
Now, what if we wanted to change directories from ~ (home) to raw_fastq in a single step?
$ cd ~/unix_lesson/raw_fastq
Voila! You have moved 2 levels of directories in one command.
To move back up, use the full path or .. for the parent directory:
$ cd ~/unix_lesson
Tip —
cd -jumps back to the previous directory you were in.
Exercises
- First, move to your home directory.
- Then, list the contents of the
reference_datadirectory that is within theunix_lessondirectory.
Tab completion
Typing out full directory names can be time-consuming and error-prone. One way to avoid that is to use tab completion. The tab key is located on the left side of your keyboard, right above the caps lock key. When you start typing out the first few characters of a directory name, then hit the tab key, Shell will try to fill in the rest of the directory name.
For example, first type cd to get back to your home directly, then type cd uni, followed by pressing the tab key:
$ cd
$ cd uni<tab>
The shell will fill in the rest of the directory name for unix_lesson.
Now, let’s go into raw_fastq, then type ls Mov10_oe_, followed by pressing the tab key once:
$ cd raw_fastq/
$ ls Mov10_oe_<tab>
Nothing happens!!
The reason is that there are multiple files in the raw_fastq directory that start with Mov10_oe_. As a result, shell does not know which one to fill in. When you hit tab a second time again, the shell will then list all the possible choices.
$ ls Mov10_oe_<tab><tab>
Now you can select the one you are interested in listed, and enter the number and hit tab again to fill in the complete name of the file.
$ ls Mov10_oe_1<tab>
NOTE: Tab completion can also fill in the names of commands. For example, enter
e<tab><tab>. You will see the name of every command that starts with ane. One of those isecho. If you enterech<tab>, you will see that tab completion works.
Tab completion is your friend! It helps prevent spelling mistakes, and speeds up the process of typing in the full command. We encourage you to use this when working on the command line.
Relative paths
We have talked about full paths so far, but there is
a way to specify paths to folders and files without having to worry
about the root directory. And you have used this before when we were
learning about the cd command.
Let’s change directories back to our home directory, and once more change directories from ~ (home) to raw_fastq in a single step. (Feel free to use your tab-completion to complete your path!)
$ cd
$ cd unix_lesson/raw_fastq
This time we are not using the ~/ before unix_lesson. In this case we are using a relative path, relative to our current location - wherein we know that unix_lesson is a child folder in our home folder, and the raw_fastq folder is within unix_lesson.
Previously we had used the following:
$ cd ~/unix_lesson/raw_fastq
There is also a handy shortcut for the relative path to a parent directory, 2 periods ... Let’s say we wanted to move from the raw_fastq folder to its parent folder.
cd ..
You should now be in the unix_lesson directory (check command prompt or run pwd).
You will be learning a little more about the
..shortcut later. Can you think of an example when this shortcut to the parent directory won’t work?Answer
When you are at the root directory, since there is no parent to the root directory!
When using relative paths, you might need to check what the branches
are downstream of the folder you are in. There is a really handy command
(tree) that can help you see the structure of any directory.
$ tree
If you are aware of the directory structure, you can string together as long a list of directories as you like using either relative or full paths.
Synopsis of Full versus Relative paths
A full path always starts with / (root) and works from anywhere. A relative path starts from your current directory and is shorter to type.
Copying, creating, moving and removing data
Now we can move around within the directory structure using the command line. But what if we want to do things like copy files or move them from one directory to another, rename them?
Let’s move into the raw_fastq directory, this contains some fastq files which are the output of sequencing.
cd ~/unix_lesson/raw_fastq
Copying
Let’s use the copy (cp) command to make a copy of one of the files in this folder, Mov10_oe_1.subset.fq, and call the copied file Mov10_oe_1.subset-copy.fq.
The copy command has the following syntax:
cp path/to/item-being-copied path/to/new-copied-item
In this case the files are in our current directory, so we just have to specify the name of the file being copied, followed by whatever we want to call the newly copied file.
$ cp Mov10_oe_1.subset.fq Mov10_oe_1.subset-copy.fq

$ ls -l
The copy command can also be used for copying over whole directories, but the -r argument has to be added after the cp command. The -r stands for “recursively copy everything from the directory and its sub-directories”. We used it earlier when we copied over the unix_lesson directory to our home directories.
Creating
Next, let’s create a directory called fastq_backup and we can move the copy of the fastq file into that directory.
The mkdir command is used to make a directory, syntax: mkdir name-of-folder-to-be-created.
$ mkdir fastq_backup
Tip — Avoid spaces in file/directory names. Use underscores (
snake_case) or hyphens instead.
Moving
We can now move our copied fastq file in to the new directory. We can move files around using the move command, mv, syntax:
mv path/to/item-being-moved path/to/destination
In this case we can use relative paths and just type the name of the file and folder.
$ mv Mov10_oe_1.subset-copy.fq fastq_backup
Let’s check if the move command worked like we wanted:
$ ls -l fastq_backup
Renaming
The mv command has a second functionality, it is what you would use to rename files too. The syntax is identical to when we used mv for moving, but this time instead of giving a directory as its destination, we just give a new name as its destination.
Let’s try out this functionality!
The name Mov10_oe_1.subset-copy.fq is not very informative, we want to make sure that we have the word “backup” in it so we don’t accidentally delete it.
$ cd fastq_backup

$ mv  Mov10_oe_1.subset-copy.fq   Mov10_oe_1.subset-backup.fq

$ ls
Tip - You can use move to move a file and rename it at the same time!
Warning —
mvoverwrites without warning. Usemv -ito prompt before overwriting.
Removing
We find out that we did not need to create backups of our fastq files
manually as backups were generated by our collaborator; in the interest
of saving space on the cluster, we want to delete the contents of the fastq-backup folder and the folder itself.
$ rm Mov10_oe_1.subset-backup.fq
Important notes about rm
rmpermanently removes/deletes the file/folder.- There is no concept of “Trash” or “Recycle Bin” on the command-line. When you use
rmto remove/delete they’re really gone. - Be careful with this command!
- You can use the
-iargument if you want it to ask before removing,rm -i file-name.
Let’s delete the fastq_backup folder too. First, we’ll have to navigate our way to the parent directory (we can’t delete the folder we are currently in/using).
$ cd ..

$ rm  fastq_backup
Did that work? Did you get an error?
Explanation
By default, rm, will NOT delete directories, but you use the -r flag if you are sure that you want to delete the directories and everything within them. To be safe, let's use it with the -i flag.
$ rm -ri fastq_backup
-r: recursive, commonly used as an option when working with directories, e.g. withcp.-i: prompt before every removal.
Exercise
- Create a new folder in
unix_lessoncalledselected_fastq - Copy over the Irrel_kd_2.subset.fq and Mov10_oe_2.subset.fq from
raw_fastqto the~/unix_lesson/selected_fastqfolder - Rename the
selected_fastqfolder and call itexercise1
Exiting from the cluster
To close the interactive session on the cluser as well as to disconnect from the cluster, the command is exit. So, you are going to have to run the exit command twice.
[SLURM] (base) username@lab417:~$ exit
exit
(base) username@lab417:~$ exit
logout
Connection to lab417.saiab.ac.za closed.
Commands
cd          # change directory
ls          # list contents
man         # manual for a command
pwd         # check present working directory
tree        # prints a tree of the file structure
cp          # copy
mkdir       # make new directory
mv          # move or rename
rm          # remove/delete
Shortcuts
~           # home directory
.           # current directory
..          # parent directory
This lesson has been modified from a course developed by members of the teaching team at the Harvard Chan Bioinformatics Core (HBC). These are open access materials distributed under the terms of the Creative Commons Attribution license (CC BY 4.0), which permits unrestricted use, distribution, and reproduction in any medium, provided the original author and source are credited.
- The materials used in this lesson were derived from work that is Copyright © Data Carpentry (http://datacarpentry.org/). All Data Carpentry instructional material is made available under the Creative Commons Attribution license (CC BY 4.0).
- Adapted from the lesson by Tracy Teal. Original contributors: Paul Wilson, Milad Fatenejad, Sasha Wood and Radhika Khetani for Software Carpentry (http://software-carpentry.org/)